Table of Contents
ToggleMastering the Recycle Bin in Windows: A Complete Guide to File Management
Every time you delete a file or folder in Windows, it doesn’t get permanently erased from your computer right away. Instead, the file is moved to the Recycle Bin, a temporary storage location designed to act as a safety net. This gives you a chance to recover files that were accidentally deleted, saving you from costly mistakes.
The Recycle Bin is a critical feature in Windows for managing file deletions and preventing permanent data loss. It’s a convenient tool that lets you recover files with just a few clicks. But, what if your Recycle Bin is full? Or you accidentally delete something that’s been there for too long? And what happens if you want to empty it to free up disk space?
In this comprehensive guide, we’ll explore how the Recycle Bin works, best practices for managing deleted files, how to recover files, and some troubleshooting tips when things go wrong.
How the Recycle Bin Works in Windows
The Recycle Bin is an essential feature of the Windows operating system. Its purpose is simple: it temporarily stores files that you delete, giving you a second chance to recover them before they are permanently removed from your computer. But how does it work?
When you delete a file, Windows doesn’t immediately erase it from the hard drive. Instead, the file is relocated to the Recycle Bin. Here’s what happens behind the scenes:
-
File Deletion: When you delete a file (by pressing Delete or dragging it to the Recycle Bin), the file’s data is moved to a hidden folder on your computer called
$Recycle.Bin. It’s still on your hard drive, but it’s no longer visible or accessible through the usual file paths. -
Temporary Storage: The file stays in the Recycle Bin until you either recover it or permanently delete it. Files in the Recycle Bin are considered “deleted” by the operating system, but they’re not completely erased until you empty the bin.
-
Recycle Bin Limits: The Recycle Bin has a storage limit based on the total size of the files it holds. By default, the Recycle Bin is allocated about 5-10% of your disk space. However, you can adjust this limit if necessary. Once this limit is reached, older files will automatically be deleted to make room for newer ones.
-
Restoring Files: You can easily restore files from the Recycle Bin. When you restore a file, it goes back to its original location on the computer. The file is no longer in the Recycle Bin and is treated like any other regular file.
How to Access the Recycle Bin
Accessing the Recycle Bin is simple. There are several ways you can open the Recycle Bin in Windows:
1. Using the Desktop Icon
By default, the Recycle Bin is located on your desktop as an icon. You can double-click it to open and view all files that have been deleted.
-
Emptying the Recycle Bin: You can right-click on the Recycle Bin icon and select Empty Recycle Bin to delete everything in it permanently.
-
Restoring Files: If you want to recover a file, simply open the Recycle Bin, right-click on the file you want to restore, and select Restore. The file will return to its original location.
2. Using File Explorer
You can also access the Recycle Bin from File Explorer:
-
Open File Explorer (Windows + E).
-
In the left-hand sidebar, under This PC, scroll down until you see the Recycle Bin.
-
Click on it to view and manage deleted files.
3. Search for the Recycle Bin
You can search for the Recycle Bin by pressing Windows Key + S, typing “Recycle Bin” into the search bar, and selecting the option when it appears in the results.
How to Restore Files from the Recycle Bin
If you’ve accidentally deleted a file or folder, don’t panic! The Recycle Bin allows you to restore files and recover them before they’re permanently deleted.
Here’s how to restore files from the Recycle Bin:
-
Open the Recycle Bin: Double-click the Recycle Bin icon on your desktop or use one of the alternative methods mentioned above.
-
Find the File: Browse through the contents of the Recycle Bin to find the file or folder you want to restore. You can also use the search bar in the upper-right corner of the window to quickly locate specific files.
-
Restore the File: Once you’ve located the file you want to recover, right-click on it and select Restore. The file will be restored to its original location on your computer.
-
Tip: If you’ve deleted multiple files and want to restore all of them, you can press Ctrl + A to select all items in the Recycle Bin, and then right-click and select Restore.
-
How to Permanently Delete Files from the Recycle Bin
If you’re sure that you no longer need a file and want to free up space on your computer, you can permanently delete files from the Recycle Bin. Here’s how:
-
Open the Recycle Bin: Access it by double-clicking the Recycle Bin icon or using one of the alternative methods.
-
Select the Files: Browse through the files and select the ones you want to permanently delete. You can use Ctrl + A to select all files if necessary.
-
Delete the Files: Right-click on the selected files and choose Delete. Alternatively, you can click Empty Recycle Bin in the top-right corner of the window. You will be asked to confirm the deletion before the files are permanently erased.
-
Tip: To delete individual files permanently without opening the Recycle Bin, select the file in File Explorer, then press Shift + Delete.
-
Changing Recycle Bin Settings
Windows gives you the flexibility to configure the Recycle Bin according to your needs. Here are some ways you can modify its settings:
1. Changing the Size of the Recycle Bin
By default, the Recycle Bin takes up a certain percentage of your hard drive’s storage (usually 5-10%). If you want to increase or decrease this size, follow these steps:
-
Right-click on the Recycle Bin icon on your desktop and select Properties.
-
In the Properties window, you’ll see the option to adjust the maximum size of the Recycle Bin for each drive. You can either:
-
Set a custom size: Adjust the slider or enter a specific size limit in MB.
-
Let Windows manage the size: This option will automatically adjust the size based on your needs.
-
-
Click Apply and then OK to save your changes.
2. Removing the Recycle Bin from the Desktop
If you prefer not to see the Recycle Bin on your desktop, you can hide it:
-
Open Settings (Windows + I).
-
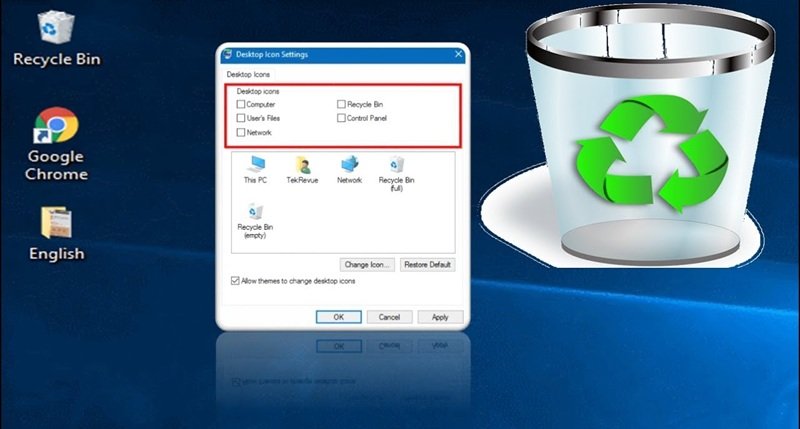
Navigate to Personalization > Themes > Desktop Icon Settings.
-
Uncheck the Recycle Bin option and click Apply.
This will remove the Recycle Bin from the desktop, but it will still be accessible through File Explorer.
Troubleshooting the Recycle Bin
While the Recycle Bin works smoothly most of the time, there are occasional issues that users encounter. Here are some common problems and their solutions:
1. Files Not Being Deleted Properly
Sometimes, you might find that files aren’t being deleted properly or are not appearing in the Recycle Bin at all. To fix this issue:
-
Check if the file is too large: If a file is too large (over the Recycle Bin’s size limit), it will bypass the Recycle Bin and be permanently deleted.
-
Empty the Recycle Bin manually: Right-click on the Recycle Bin icon and select Empty Recycle Bin. This should clear out any stuck or undeleted files.
-
Run a Disk Check: Corrupt system files or disk issues may cause deletion problems. Run chkdsk to scan for and fix errors on your disk.
2. Unable to Restore Files from the Recycle Bin
If you’re having trouble restoring files from the Recycle Bin, it could be due to the following reasons:
-
The file has already been permanently deleted: If the file has been in the Recycle Bin for a while or the Bin is full, older files may be automatically deleted to make room for newer ones.
-
File Corruption: Sometimes, files in the Recycle Bin can become corrupted, making it impossible to restore them. In this case, you may need to use a third-party data recovery tool to attempt recovery.
3. Recycle Bin Keeps Filling Up Quickly
If your Recycle Bin keeps filling up quickly, it might be because the settings are configured to hold a large volume of data, or your computer is generating a lot of deletions. To manage this:
-
Set a smaller size limit: Adjust the maximum size of the Recycle Bin to a smaller value in the Properties settings.
-
**Manually empty the Recycle Bin**: If you notice that the Recycle Bin is filling up quickly, consider getting into the habit of manually emptying it after you’ve recovered any important files.
-
Use the “Don’t Move Files to the Recycle Bin” Option: If you want to bypass the Recycle Bin altogether and delete files immediately, you can configure your system to skip the Recycle Bin entirely. Here’s how to do that:
-
Right-click the Recycle Bin icon and select Properties.
-
Under the Global Settings tab, check the option “Don’t move files to the Recycle Bin. Remove files immediately when deleted.”
-
Click Apply and OK.
-
This setting will permanently delete files without them going to the Recycle Bin. While this option can be useful if you’re sure about your file deletions, it does remove the ability to recover deleted files.
Read More: How to Fix Your PC with System Restore
Best Practices for Managing the Recycle Bin
While the Recycle Bin is a great tool for managing file deletions, it’s important to practice good file management to avoid cluttering your system and ensure smooth operation. Here are some best practices to help you manage the Recycle Bin effectively:
1. Regularly Empty the Recycle Bin
The Recycle Bin is meant to be a temporary storage location. Files that are no longer needed should be removed from it regularly to avoid taking up valuable disk space. Set a reminder to empty the Recycle Bin every week or month, depending on how frequently you delete files.
2. Monitor the Size of Files in the Recycle Bin
If you frequently delete large files, you may want to check the size of the files in the Recycle Bin. These files can take up a significant amount of space, especially if your Recycle Bin is set to a large storage capacity.
You can check the size of the Recycle Bin by right-clicking on it and selecting Properties. If you notice that large files are taking up too much space, consider reducing the maximum size or deleting files that are no longer necessary.
3. Use Data Recovery Software for Important Files
If you find that you often need to recover important files, consider using data recovery software as a backup option. While the Recycle Bin is an excellent tool for casual recovery, sometimes files can be accidentally deleted or emptied from the Bin. In such cases, third-party data recovery tools, like Recuva or EaseUS Data Recovery Wizard, may be able to help recover files that have been permanently deleted.
4. Don’t Use the Recycle Bin as a Long-Term Storage Solution
While it might seem convenient, using the Recycle Bin as a storage location for files you’re unsure about is not ideal. If you know you no longer need a file, delete it directly instead of keeping it in the Recycle Bin. Conversely, if you think you may need the file again, consider backing it up to a different location (external drive or cloud storage) instead of leaving it in the Bin.
5. Keep Your Recycle Bin Organized
If you delete multiple files at once, especially when working on projects or cleaning up your computer, the Recycle Bin can become cluttered. You can sort the contents of the Recycle Bin by name, date deleted, or size, making it easier to find files to restore or delete. To do this:
-
Open the Recycle Bin.
-
Right-click inside the window and select Sort by. You can then choose to organize by Name, Date Deleted, or Size.
This will help you identify files you want to restore or permanently delete based on the parameters that matter to you.
Advanced Recovery Methods
While the Recycle Bin is a great tool for most cases, there are times when you need advanced recovery methods to recover files, especially if they’ve been removed from the Recycle Bin or you’ve set your computer to bypass it altogether. Here are a few options to consider:
1. System Restore
If you’ve accidentally deleted critical system files or files that can’t be found in the Recycle Bin, you can use System Restore to revert your system to a previous state. System Restore can restore your system files and settings, but it does not recover personal files such as documents, photos, or videos. However, if the deleted files were part of the operating system, this might help bring them back.
To use System Restore:
-
Press Windows + S and type System Restore.
-
Select Create a restore point, then click on System Restore.
-
Follow the on-screen instructions to choose a restore point before the files were deleted.
2. Use Data Recovery Software
If the files you’ve deleted are no longer in the Recycle Bin and you haven’t backed them up, you can try using data recovery software. Programs like Recuva, EaseUS Data Recovery, and Disk Drill can help recover deleted files from your hard drive.
These programs scan your hard drive for remnants of deleted files and allow you to recover them as long as the sectors on the disk haven’t been overwritten.
To use a data recovery program:
-
Download and install the software (on a different drive, not the one you want to recover from).
-
Launch the program and select the drive where your files were deleted.
-
Run a scan to detect deleted files and choose the files you wish to recover.
3. Professional Data Recovery Services
If you’ve exhausted all options and your data is critical, you can opt for professional data recovery services. These services involve specialized techniques and equipment to recover data from damaged or corrupted storage devices. However, these services can be expensive, so they are typically used as a last resort.
Conclusion
The Recycle Bin in Windows is an incredibly useful tool for managing deleted files. It gives you a second chance to recover files you’ve accidentally deleted, saving you from making costly mistakes. However, it’s essential to understand how it works, how to manage it, and when to use advanced recovery methods if needed.
By following best practices like regularly emptying the Recycle Bin, managing its size, and making use of system backups or data recovery tools, you can ensure your deleted files don’t get in the way of your computer’s performance.
Whether you’re a casual computer user or a professional, mastering the Recycle Bin will help you manage your files more effectively and protect against unintentional data loss. Just remember: the Recycle Bin is a temporary safety net—so be sure to handle your files with care and back up important data whenever possible.
FAQs
-
Can I recover files after emptying the Recycle Bin? Yes, it’s still possible to recover files after emptying the Recycle Bin using third-party data recovery software. However, the sooner you attempt recovery, the higher the chances of success.
-
What happens if I delete a file too large for the Recycle Bin? If a file exceeds the Recycle Bin’s size limit, it will bypass the bin and be permanently deleted immediately. You can adjust the Recycle Bin size limit in its settings if you want to increase the storage capacity.
-
How can I restore a file that’s been permanently deleted? If a file is permanently deleted (from the Recycle Bin or by using Shift + Delete), you may still be able to recover it using specialized data recovery software. If that doesn’t work, you may need to seek professional recovery services.
-
Can I disable the Recycle Bin completely? Yes, you can disable the Recycle Bin by configuring your system settings to bypass it. However, this means that deleted files will be lost permanently, so use this option with caution.
-
Why is my Recycle Bin always full? If your Recycle Bin fills up quickly, it might be due to the size limit being set too high, or you’re deleting a lot of large files. You can either reduce the Recycle Bin size or manage file deletions more efficiently by manually emptying it more often.